3.7 KiB
title, description, ms.prod, ms.mktglfcycl, ms.sitesec, ms.pagetype, ms.author, author, ms.date, ms.reviewer, manager, ms.topic
| title | description | ms.prod | ms.mktglfcycl | ms.sitesec | ms.pagetype | ms.author | author | ms.date | ms.reviewer | manager | ms.topic |
|---|---|---|---|---|---|---|---|---|---|---|---|
| Application upgrades on Windows 10 Mobile | Learn how to deploy upgrades to applications running on Windows 10 Mobile. | w10 | deploy | library | mobile | dansimp | dansimp | 07/21/2017 | dansimp | article |
Deploy application upgrades on Windows 10 Mobile
Applies to: Windows 10
When you have a new version of an application, how do you get that to the Windows 10 Mobile devices in your environment? With application supersedence in Microsoft Endpoint Configuration Manager.
There are two steps to deploy an app upgrade:
- Define the supersedence - this lets Configuration Manager know that the old version should be replaced by the new version.
- Deploy the upgrade to your users.
The following steps walk you through the upgrade deployment process - we have an upgraded version of the Walking Scorer app (moving from version 12.23.2.0 to 12.23.3.0). Because we previously used Configuration Manager to deploy the existing version, we'll use it now to upgrade the app.
Before you can deploy the upgrade, make sure you import the new version of the app and distribute it to your manage.microsoft.com distribution point.
Define app supersedence
-
In the Configuration Manager console, open the Software Library, and then find the new version of your app.
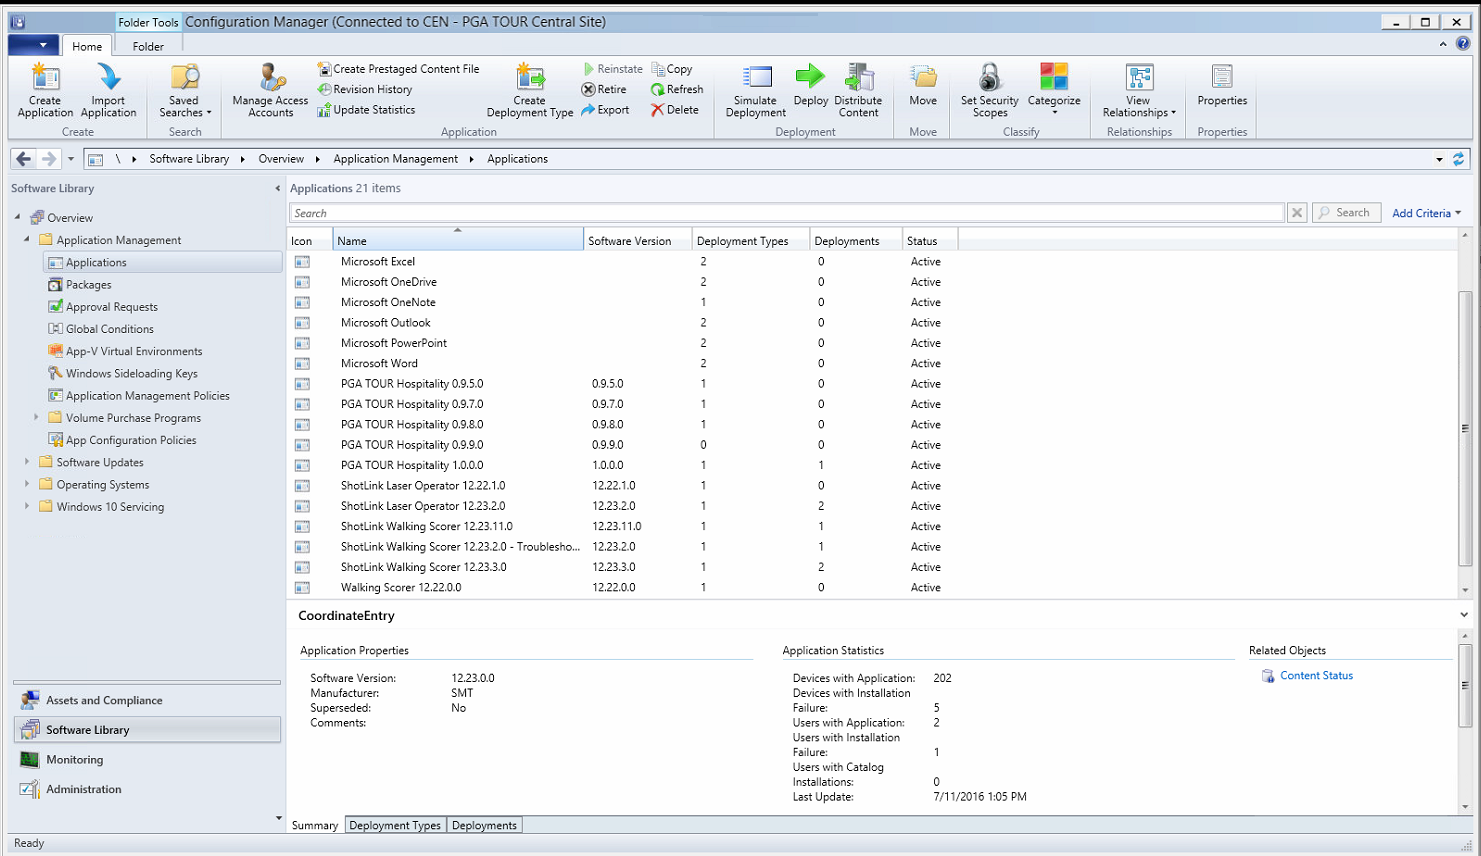
-
Right-click the new version, and then click Properties.
-
Click the Supersedence tab - there shouldn't be any supersedence rules yet. We'll add one next.
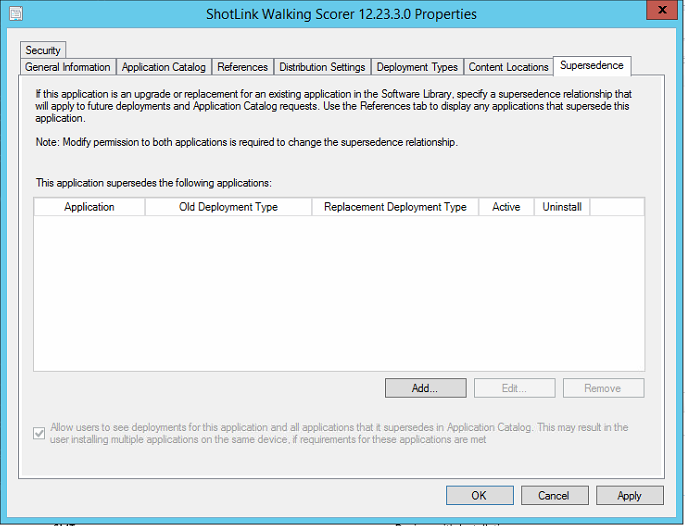
-
Click Add, browse to the existing (older) version of the app that you're upgrading, and then click OK.
-
Under New Deployment Type select the new version of the app. (When you imported the new version, it comes in as a new deployment type. If you're upgrading a Universal application, you'll see only one type here.)
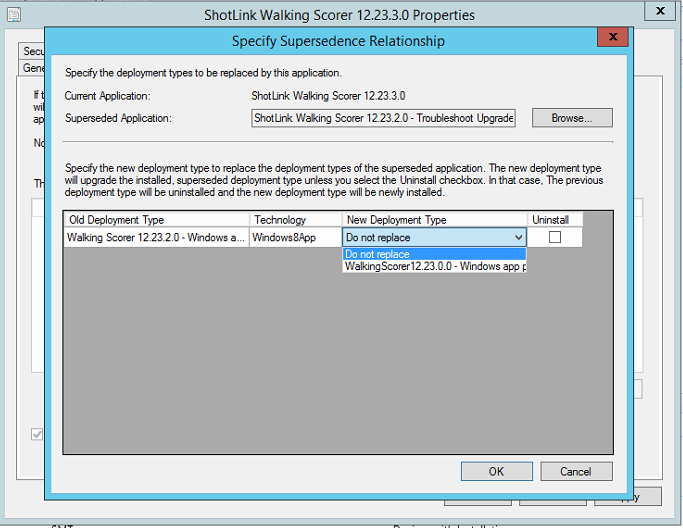
Important
Do NOT select Uninstall. This tells Configuration Manager to uninstall the old version, but it does NOT then install the new version.
-
Click OK.
-
If you have other versions of the same app, repeat steps 4-6 for each version. Click OK when you're done.
Note
Need to remove a supersedence? (Maybe the new version turned out to be flaky and you don't want users to get it yet.) On the Supersedence tab for the new version of the app, double-click the older version in the list of supersedence rules, and then change the New Deployment Type to Do not replace.
Deploy the app upgrade
You're now ready to deploy the upgrade. On the Home tab in Configuration Manager, select the new version of the app, and then click Deploy, and follow the instructions in the wizard. When asked, set the Purpose to Required.
You don't need to delete the deployment associated with the older version of the app. The status for that deployment will change to Requirements not met in the Monitoring view:
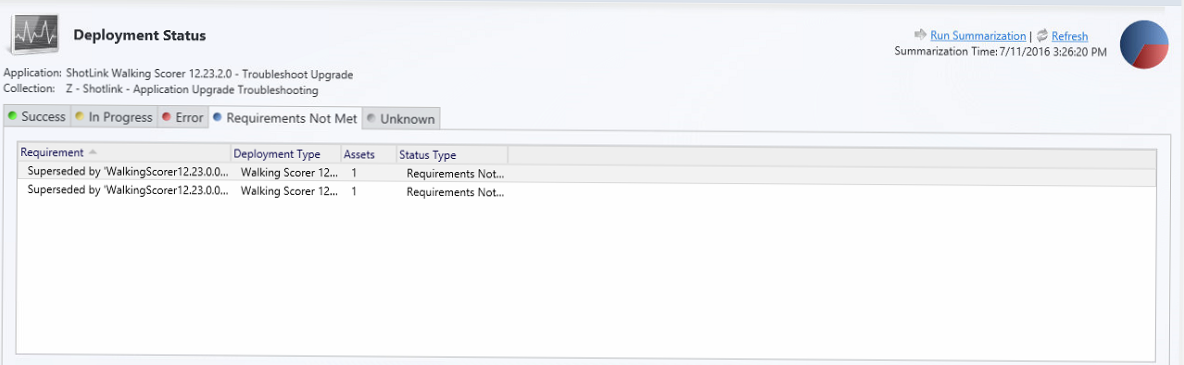
If you haven't deployed an app through Configuration Manager before, check out Deploy applications with Microsoft Endoint Configuration Manager. You can also see how to delete deployments (although you don't have to) and notify users about the upgraded app.