21 KiB
title, description, keywords, ms.prod, ms.mktglfcycl, ms.sitesec, ms.pagetype, ms.localizationpriority, author, ms.author, ms.date
| title | description | keywords | ms.prod | ms.mktglfcycl | ms.sitesec | ms.pagetype | ms.localizationpriority | author | ms.author | ms.date |
|---|---|---|---|---|---|---|---|---|---|---|
| Use Set up School PCs app | Learn how the Set up School PCs app works and how to use it. | shared cart, shared PC, school, Set up School PCs, overview, how to use | w10 | deploy | library | edu | high | CelesteDG | celested | 12/11/2017 |
Use the Set up School PCs app
Applies to:
- Windows 10
IT administrators and technical teachers can use the Set up School PCs app to quickly set up PCs for students. A student PC set up using the app is tailored to provide students with the tools they need for learning while removing apps and features that they don't need.
What does this app do?
Set up School PCs makes it easy to set up Windows 10 PCs with Microsoft's recommended education settings, using a quick USB setup. This app guides you through the creation of a student PC provisioning package and helps you save it to a USB drive. From there, just plug the USB drive into student PCs running Windows 10 Creators Update (version 1703). It automatically:
- Joins each student PC to your organization's Office 365 and Azure Active Directory tenant
- Enrolls each student PC into a mobile device management (MDM) provider, like Intune for Education, if licensed in your tenant. You can manage all the settings Set up School PCs sets later through MDM.
- Removes OEM preinstalled software from each student PC
- Auto-configures and saves a wireless network profile on each student PC
- Gives a friendly and unique name to each student device for future management
- Sets Microsoft-recommended school PC settings, including shared PC mode which provides faster sign-in and automatic account cleanup
- Enables optional guest account for younger students, lost passwords, or visitors
- Enables optional secure testing account
- Enables optional Windows Automatic Redeployment feature to return devices to a fully configured or known IT-approved state
- Locks down the student PC to prevent mischievous activity:
- Prevents students from removing the PC from the school's device management system
- Prevents students from removing the Set up School PCs settings
- Keeps student PCs up-to-date without interfering with class time using Windows Update and maintenance hours
- Customizes the Start layout with Office
- Installs OneDrive for storing cloud-based documents and Sway for creating interactive reports, presentations, and more
- Uninstalls apps not specific to education, such as Solitaire
- Prevents students from adding personal Microsoft accounts to the PC
You can watch the video to see how to use the Set up School PCs app, or follow the step-by-step guide.
You can watch the descriptive audio version here: Microsoft Education: Use the Set up School PCs app (DA)
Tips for success
-
Run the same Windows 10 build on the admin device and the student PCs
It's critical that the IT administrator's or technical teacher's device is running the same Windows 10 build as the student PCs that you're provisioning.
-
Ensure that the student PCs meet the minimum OS requirements for the version of Set up School PCs
Check the minimum OS requirements for the Set up School PCs app in the System Requirements > OS section of the app's description on the Microsoft Store. For example, the latest version of Set up School PCs requires Windows 10 versions with build 15063.0 or higher. Do not use the app to provision student PCs with Windows 10, version 1607 (build 14393) images.
We recommend using the latest Set up School PCs app along with the latest Windows 10 images on the student PCs that you're provisioning.
-
Run the app at work
For the best results, run the Set up School PCs app on your work device connected to your school's network. That way the app can gather accurate information about your wireless networks and cloud subscriptions.
Note
Don't use the Set up Schools PCs app for PCs that must connect to enterprise networks or to open Wi-Fi networks that require the user to accept Terms of Use.
-
Network tips
- You cannot use Set up School PCs over a certification-based network, or one where you have to enter credentials in a browser. You can only connect to an open network, or one with a basic password.
- If you need to set up a lot of devices over Wi-Fi, make sure that your network configuration can support it.
- We recommend configuring your DHCP so at least 200 IP addresses are available for the devices you are setting up. Configure your IP addresses to expire after a short time (about 30 minutes). This ensures that you can set up many devices simultaneously, and IP addresses will free up quickly so you can continue to set up devices without hitting network issues.
-
Apply to new student PCs
- The provisioning package that the Set up School PCs app creates should be used on new PCs that haven't been set up for accounts yet. If you apply the provisioning package to a student PC that has already been set up, existing accounts and data might be lost.
Warning
Only use the provisioning package on PCs that you want to configure and lock down for students. After you apply the provisioning package to a student PC, the PC must be reset to remove the settings.
- The student PCs must be in range of the Wi-Fi network that you configured in Set up School PCs or have a wired Ethernet connection when you set them up. Otherwise, setup will fail.
- If the PC has already been set up and you want to return to the first-run experience to apply a new package, you can reset the PC to get to a clean state and get it back to the first-run experience and ready to provision again.
To do this:
- Go to Settings > Update & security > Recovery. In the Reset this PC section of the Recovery page, click Get started.
- Or, hit Shift + click Restart in the Power menu to load the Windows boot user experience. From there, follow these steps:
- Click Troubleshoot and then choose Reset this PC.
- Select Remove everything.
- Select No - remove provisioning packages.
- Select Only the drive where Windows is installed (this may not always show up).
- Click Just remove my files.
- Click Reset.
-
Use an NTFS-formatted USB key
If you're planning to install several apps, the Set up School PCs package may exceed 4 GB. Check if your USB drive format is FAT32. If it is, you won't be able to save more than 4 GB of data on the drive. To work around this, reformat the USB drive to use the NTFS format. To do this:
- Insert the USB key into your computer.
- Go to the Start menu and type This PC and then select the This PC (Desktop app) from the search results.
- In the Devices and drivers section, find the USB drive, select and then right-click to bring up options.
- Select Format from the list to bring up the Format window.
- Set File system to NTFS and then click Start to format the drive.
-
Use more than one USB key
If you are setting up multiple PCs, you can set them up at the same time. Just save the provisioning package to another USB drive. Create two keys and you can run it on two PCs at once, and so on.
-
Keep it clean
We strongly recommend that IT avoid changes to policies unless absolutely necessary, as any changes can impair performance and sign-in time. Get more information at Set up School PCs app technical reference.
-
Get more info
Learn more about what Set up School PCs does, including provisioning details, in Technical reference for the Set up School PCs app.
Prerequisites
-
Download the latest Set up School PCs app from the Microsoft Store.
The app supports these languages: Chinese (Simplified), Chinese (Traditional), Danish, Dutch, English (United Kingdom), English (United States), French, German, Italian, Japanese, Korean, Norwegian, Polish, Portuguese (Brazil), Russian, Spanish (Spain), Spanish (Mexico), Swedish, and Turkish.
-
Install the app on your work PC and make sure you're connected to your school's network.
-
You must have Office 365 and Azure Active Directory.
-
You must have the Microsoft Store for Education configured.
-
You must be a global admin in the Microsoft Store for Education.
-
It's best if you sign up for and configure Intune for Education before using the Set up School PCs app.
-
Have a USB drive, 1 GB or larger, to save the provisioning package. We recommend an 8 GB or larger USB drive if you're installing Office.
-
Check the default file system format for your USB drive. You may need to set this to NTFS to save a provisioning package that's 4 GB or larger.
Set up School PCs step-by-step
Create the provisioning package
The Set up School PCs app guides you through the configuration choices for the student PCs.
- Launch the Set up School PCs app.
Figure 1 - Launch the Set up School PCs app
- Click Get started.
- To sign in to your school's Office 365 account, in the First step: Let's get you signed in page:
To get the best option for setup and enable student PCs to automatically be connected to Office 365, Azure AD, and management services like Intune for Education, click Sign-in.
To complete setup without signing in, click Skip. Student PCs won't be connected to your school's cloud services and managing them will be more difficult later.
If you opt to sign in, follow these steps:
1. Choose the account from the list. If you don't see the account, select **Work or school account**, click **Continue**, and enter the account details.
2. Click **Next** once you've specified the account.
3. If you added an account, you may be asked to provide the user account and password. You will get a notification to allow the app to access your account. This will give Set up School PCs permission to access Store for Business, read memberships, sign you in and read your profile, and more.
4. Click **Accept**.
The account will show up as the account that Set up School PCs will use to connect the school PCs to the cloud.
**Figure 2** - Verify that the account you selected shows up

5. Click **Next**.
- To allow the student PCs to automatically connect to your school's wireless network, in the Select the school's wireless network page:
- Select the school's Wi-Fi network from the list of available wireless networks or manually add a wireless network.
- Click Next if you added or selected a wireless network, or Skip to skip configuring a wireless network.
If you click **Skip**, you will see the following dialog.
* If you select **Got it**, you will go to the next page without Wi-Fi set up.
* If you select **Add Wi-Fi**, you will go back to the Wi-Fi page to add a wireless network.
**Figure 3** - Only skip Wi-Fi if you have a wired Ethernet connection

- To assign a name to the student PCs, in the Name these devices page:
- Add a short name that Set up School PCs will use as a prefix to identify and easily manage the group of devices, apps, and other settings through your device management client.
> [!NOTE]
> The name must be five (5) characters or less. Set up School PCs automatically appends `_%SERIAL%` to the prefix that you specify. `_%SERIAL%` ensures that all device names are unique.

For example, if you add *Math4* as the prefix, the device names will be *Math4* followed by a random string of letters and numbers.
-
Click Next.
-
To specify other settings for the student PC, in the Configure student PC settings page:
-
Select Remove apps pre-installed by the device manufacturer to install only the base Windows image.
Note
If you select this option, the provisioning process will take longer (about 30 minutes).
-
Select Allow local storage (not recommended for shared devices) to let students save files to the Desktop and Documents folder on the student PC. We don't recommend this option if the device will be part of a shared cart or lab.
-
Select Optimize device for a single student, instead of a shared cart or lab to optimize the device for use by a single student (1:1).
- Check this option if the device will not be part of a shared cart or lab.
- Set up School PCs will change some account management logic so that it sets the expiration time for an account to 180 days (without requiring sign-in).
- This setting also increases the maximum storage to 100% of the available disk space. This prevents the student's account from being erased if the student stores a lot of files or data, or if the student doesn't use the PC over a prolonged period.
-
Select Let guests sign-in to these PCs to allow guests to use student PCs without a school account. For example, if the device will be in a library and you want other users (like visiting students or teachers) to be able to use the device, you can select this option.
If you select this option, this adds a Guest account button in the PC's sign-in screen to allow anyone to use the PC.
-
Select Enable Windows Automatic Redeployment to reset student PCs from the lock screen any time and apply original settings and device management enrollment (Azure AD and MDM) so they’re ready to use. Make sure you are running Windows 10, version 1709 on the student PCs if you want to use Windows Automatic Redeployment through the Set up School PCs app.
-
To change the default lock screen background or to use your school's custom lock screen background, click Browse to select a new lock screen background.
Figure 4 - Configure student PC settings
When you're doing configuring the student PC settings, click Next.
- If you want to set up the Take a Test app and use it for taking quizzes and high-stakes assessments by some providers like Smarter Balanced, configure the settings in the Set up the Take a Test app page. Windows will also lock down the student PC so that students can't access anything else while taking the test.
- Specify if you want to create a Take a Test button on the sign-in screens of students' PCs.
- Check the options whether to allow keyboard text suggestions to appear and to allow teachers to monitor online tests.
- Enter the assessment URL.
You can leave the URL blank so that students can enter one later. This enables teachers to use the Take a Test account for daily quizzes or tests by having students manually enter a URL.
**Figure 5** - Configure the Take a Test app

-
Click Next or Skip depending on whether you want to set up Take a Test.
-
In the Add recommended apps page, you can choose from a set of recommended Microsoft Store apps to provision. The recommended apps include the following:
- Office 365 for Windows 10 S (Education Preview)
- Office 365 for Windows 10 S will only work on student PCs running Windows 10 S. If you try to install this app on other editions of Windows, setup will fail.
- When adding the Office 365 for Windows 10 S to a package, the device you use to run Set up School PCs does not have to be running Windows 10 S.
- Minecraft: Education Edition - Free trial
- Popular STEM and Makerspace apps
- Select the apps that you would like to provision and then click Next when you're done. Apps that you provision on student PCs will be pinned to the Start menu.
- Click Skip if you don't want to provision any apps.
Figure 6 - Select from a set of recommended apps
The set of recommended Microsoft Store for Education apps may vary from what we show here.
-
In the Review package summary page, make sure that all the settings you configured appear correctly.
-
If you need to change any of the settings, you can on the sections to go back to that page and make your changes.
Figure 7 - Review your settings and change them as needed
-
Click Accept.
-
Insert a USB drive to save your settings and create a provisioning package on the USB drive.
-
Set up School PCs will automatically detect the USB drive after it's inserted. Choose the USB drive from the list.
-
Click Save to save the provisioning package to the USB drive.
Figure 8 - Select the USB drive and save the provisioning package
-
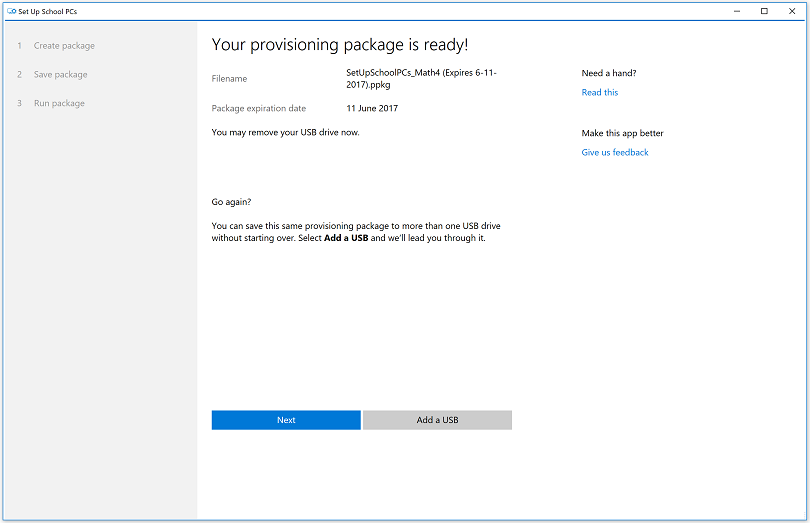
When the provisioning package is ready, you will see the name of the file and you can remove the USB drive. Click Next if you're done, or click Add a USB to save the same provisioning package to another USB drive.
Figure 9 - Provisioning package is ready
Figure 10 - Line up the student PCs and get them ready for setup
- Click Next.
- In the Install the package page, follow the instructions in Apply the provisioning package to the student PCs to set up the student PCs.
Select Create new package if you need to create a new provisioning package. Otherwise, you can remove the USB drive if you're completely done creating the package.
Figure 11 - Install the provisioning package on the student PCs
Apply the provisioning package to the student PCs
The provisioning package on your USB drive is named Set up School PCs.ppkg. A provisioning package is a method for applying settings to Windows 10 without needing to reimage the device. When Windows 10 refers to package, it means your provisioning package, and when it refers to provisioning, it means applying the provisioning package to the student PC.
Note
The student PC must contain a new or reset image and the PC must not already have been through first-run setup (OOBE).
To set up the student PC using the Set up School PCs provisioning package
-
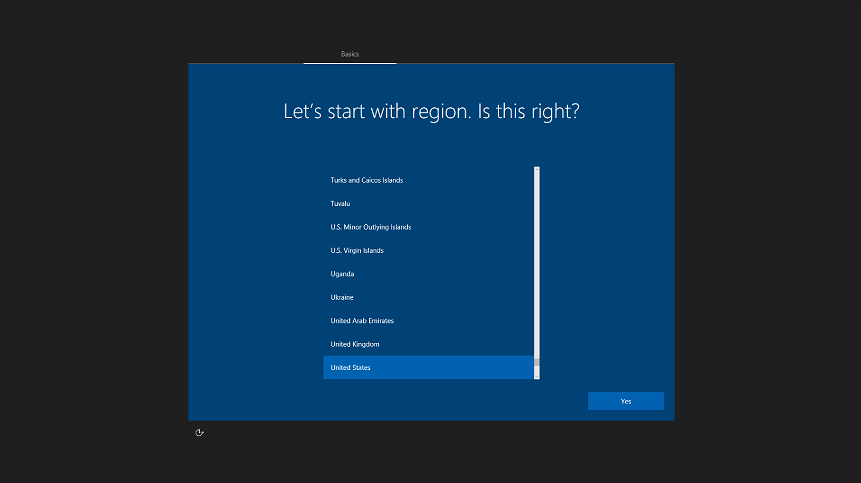
Start with the student PC turned off or with the PC on the first-run setup screen. In Windows 10 Creators Update (version 1703), this first-run setup screen says Let's start with region. Is this right?.
If the PC has gone past the account setup screen, reset the PC to start over. To reset the PC, go to Settings > Update & security > Recovery > Reset this PC.
Figure 12 - The first screen during first-run setup in Windows 10 Creators Update (version 1703)
-
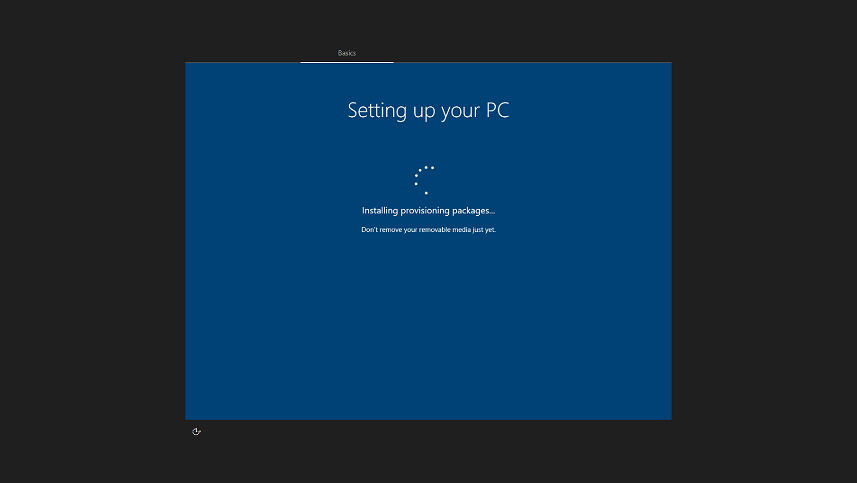
Insert the USB drive. Windows will recognize the drive and automatically install the provisioning package.
Figure 13 - Windows automatically detects the provisioning package and installs it
-
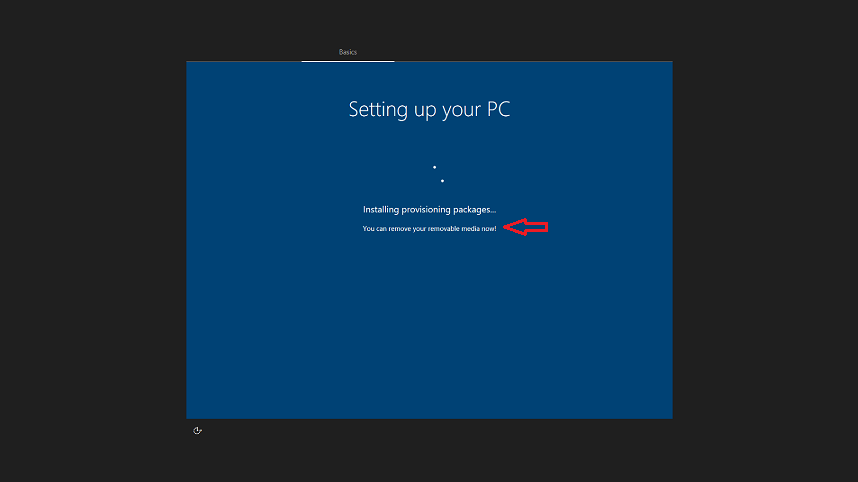
You can remove the USB drive when you see the message that you can remove the removable media. You can then use the USB drive to start provisioning another student PC.
Figure 14 - Remove the USB drive when you see the message that the media can be removed
-
If you set up the package to do Azure AD Join, that's it! You're done, and the PC is now ready for students to use.
If you did not set up the package to do Azure AD Join, go through the rest of the Windows device setup experience.


