3.7 KiB
title, description, ms.assetid, keywords, ms.prod, ms.mktglfcycl, ms.sitesec, ms.pagetype, author, localizationpriority
| title | description | ms.assetid | keywords | ms.prod | ms.mktglfcycl | ms.sitesec | ms.pagetype | author | localizationpriority |
|---|---|---|---|---|---|---|---|---|---|
| Create and deploy a VPN policy for Windows Information Protection (WIP) using Microsoft Intune (Windows 10) | After you've created and deployed your Windows Information Protection (WIP) policy, you can use Microsoft Intune to create and deploy your Virtual Private Network (VPN) policy, linking it to your WIP policy. | d0eaba4f-6d7d-4ae4-8044-64680a40cf6b | WIP, Enterprise Data Protection | w10 | explore | library | security | eross-msft | high |
Create and deploy a VPN policy for Windows Information Protection (WIP) using Microsoft Azure Intune
Applies to:
- Windows 10, version 1703
- Windows 10 Mobile, version 1703
After you've created and deployed your Windows Information Protection (WIP) policy, you can use Microsoft Azure Intune to create and deploy your Virtual Private Network (VPN) policy, linking it to your WIP policy.
Create your VPN policy using Microsoft Azure Intune
Follow these steps to create the VPN policy you want to use with WIP.
To create your VPN policy
-
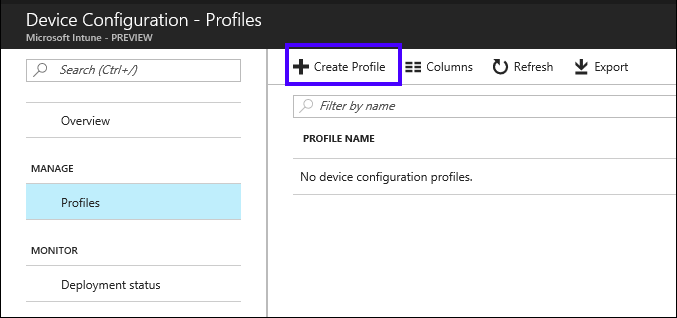
Open the Microsoft Azure Intune mobile application management console, click Device configuration, and then click Create Profile.
-
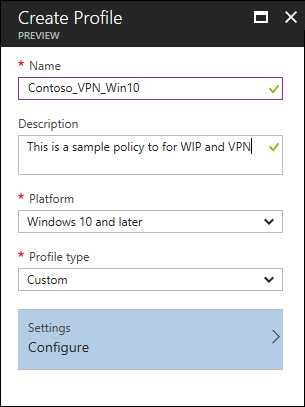
In the Create Profile blade, type a name for your profile, such as Contoso_VPN_Win10, into the Name box, add an optional description for your policy into the Description box, select Windows 10 and later from the Platform dropdown box, select Custom from the Profile type dropdown box, and then click Configure.
-
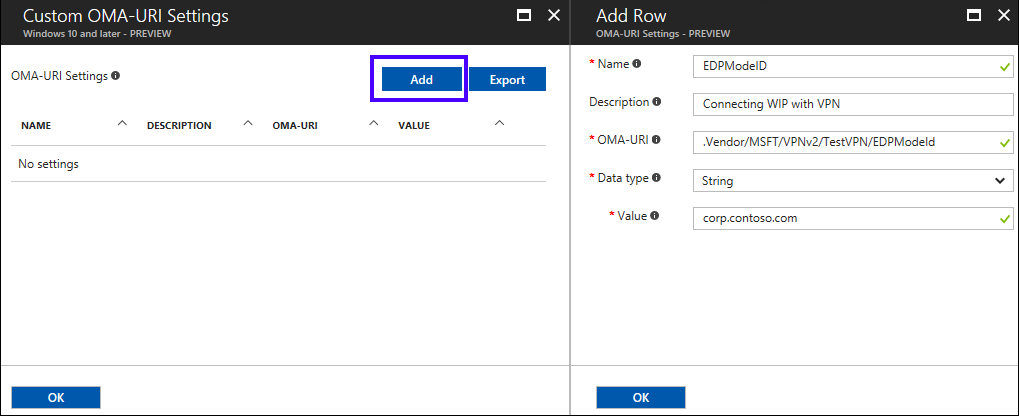
In the Custom OMA-URI Settings blade, click Add.
-
In the Add Row blade, type:
-
Name. Type a name for your setting, such as EDPModeID.
-
Description. Type an optional description for your setting.
-
OMA-URI. Type ./Vendor/MSFT/VPNv2/<VPNProfileName>/EDPModeId into the box.
-
Data type. Select String from the dropdown box
-
Value. Type your fully-qualified domain that should be used by the OMA-URI setting. For example, corp.contoso.com.
-
-
Click OK to save your setting info in the Add Row blade, and then click OK in the Custom OMA-URI Settings blade to save the setting with your policy.
-
Click Create to create the policy, including your OMA_URI info.


Deploy your VPN policy using Microsoft Azure Intune
After you’ve created your VPN policy, you'll need to deploy it to the same group you deployed your Windows Information Protection (WIP) policy.
To deploy your Custom VPN policy
-
On the App policy blade, click your newly-created policy, click User groups from the menu that appears, and then click Add user group.
A list of user groups, made up of all of the security groups in your Azure Active Directory, appear in the Add user group blade.
-
Choose the group you want your policy to apply to, and then click Select to deploy the policy.
The policy is deployed to the selected users' devices.


Note
Help to make this topic better by providing us with edits, additions, and feedback. For info about how to contribute to this topic, see Contributing to TechNet content.