15 KiB
title, description, keywords, ms.prod, ms.mktglfcycl, ms.sitesec, ms.pagetype, author
| title | description | keywords | ms.prod | ms.mktglfcycl | ms.sitesec | ms.pagetype | author |
|---|---|---|---|---|---|---|---|
| Deploy and manage a full cloud IT solution for your business | Learn how to set up a cloud infrastructure for your business, acquire devices and apps, and configure and deploy policies to your devices. | smb, full cloud IT solution, small to medium business, deploy, setup, manage, Windows, Intune, Office 365 | w10 | deploy | library | smb | CelesteDG |

Get started: Deploy and manage a full cloud IT solution for your business
Applies to:
- Windows 10
Important
This is placeholder content only. Everything is TBD.
In this walkthrough, we'll show you how to deploy and manage a full cloud IT solution for your small to medium business using Microsoft Azure AD, Intune, Office 365, and Windows. We'll show you the basics on how to:
- Acquire an Office 365 business domain
- Add Microsoft Intune and Azure Active Directory (AD) Premium licenses to your business tenant
- Set up Windows Store for Business and manage app deployment and sync with Intune
- Add users and groups in Azure AD and Intune
- Create policies and app deployment rules
- Log in as a user and start using the device
Go to the Microsoft Business site and select Products to learn more about pricing and purchasing options for businesses.
1. Get ready
Here's a few things to keep in mind before you get started:
- You'll need a registered domain to successfully go through the walkthrough.
- If you already own a domain, you can add this during the Office 365 setup.
- If you don't already own a domain, you'll have the option to purchase a domain from the Office 365 admin center. We'll show how to do this as part of the walkthrough.
- You'll need an email address to create your Office 365 tenant.
2. Set up your cloud infrastructure
To set up a cloud infrastructure for your organization, follow the steps in this section.
2.1 Set up Office 365 for business
See Set up Office 365 for business to learn more about the setup steps for businesses and nonprofits who have Office 365. You can watch video and learn how to:
- Plan your setup
- Create Office 365 accounts and how to add your domain.
- Install Office
To set up your Office 365 business tenant, see Get Started with Office 365 for business.
If this is the first time you're setting this up, and you'd like to see how it's done, you can follow these steps to get started:
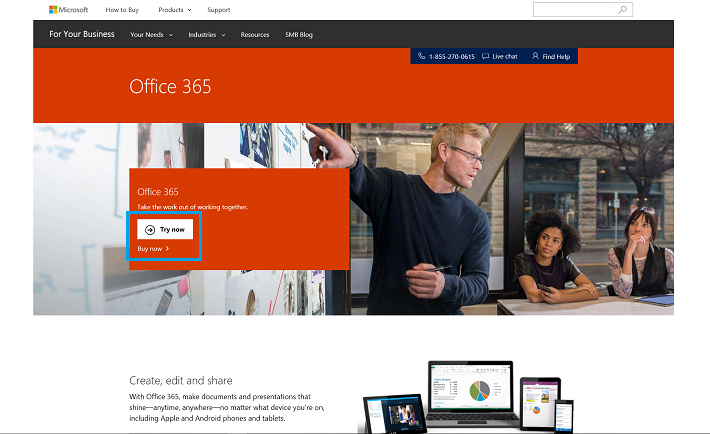
- Go to the Office 365 page in the Microsoft Business site. Select Try now to use the Office 365 Business Premium Trial or select Buy now to sign up for Office 365 Business Premium. In this walkthrough, we'll select Try now.
Figure 1 - Try or buy Office 365
- Fill out the sign up form and provide information about you and your company.
- Create a user ID and password to use to sign into your account. This step creates an onmicrosoft.com email address. You can use this email address to sign in to the various admin centers. Save your sign-in info so you can use it to sign into https://portal.office.com (the admin portal).
- Select Create my account and then enter the phone number you used in step 2 to verify your identity. You'll be asked to enter your verification code.
- Select You're ready to go... which will take you to the Office 365 portal.
Note
In the Office 365 portal, icons that are greyed out are still installing.
Figure 2 - Office 365 portal
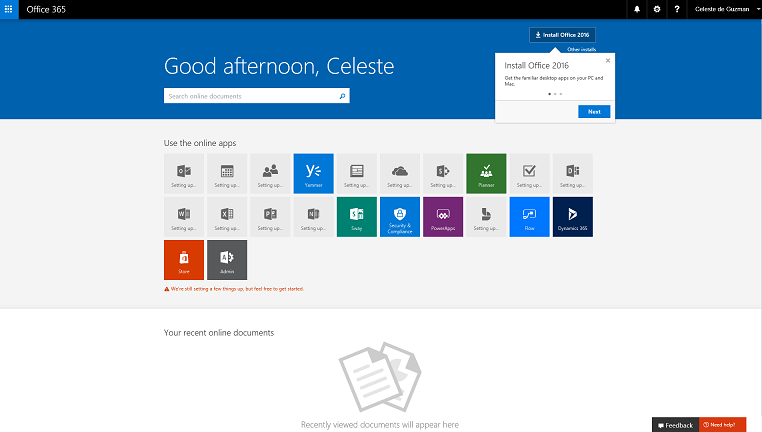
- Select the Admin tile to go to the Office 365 admin center.
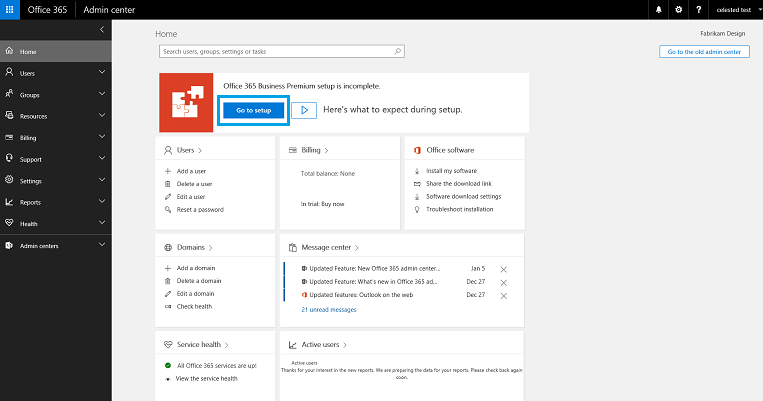
- In the admin center, click Next to see the highlights and welcome info for the admin center. When you're done, click Go to setup to complete the Office 365 setup.
This may take up to a half hour to complete.
Figure 3 - Office 365 admin center
- Go back to the Office 365 admin center page to add or buy a domain.
- Select the Domains option.
**Figure 4** - Option to add or buy a domain

- In the Home > Domains page, you will see the Microsoft-provided domain, such as fabrikamdesign.onmicrosoft.com.
**Figure 5** - Microsoft-provided domain

- If you already have a domain, select **+ Add domain** to add your existing domain. If you select this option, you'll be required to verify that you own the domain. Follow the steps in the wizard to verify your domain.
- If you don't already own a domain, select **+ Buy domain**. If you're using a trial plan, you'll be required to upgrade your trial plan in order to buy a domain. Choose the subscription plan to use for your business and provide the details to complete your order.
Once you've added your domain, you'll see it listed in addition to the Microsoft-provided onmicrosoft.com domain.
**Figure 6** - Domains

2.2 Add users individually or in bulk
Once you've set up Office and added your domain, it's time to add users so they have access to Office 365. People in your organization need an account before they can sign in and access Office 365. The easiest way to add users is to add them one at a time in the Office 365 admin center.
When adding users, you can also assign admin privileges to certain users in your team. You'll also want to assign Product licenses to each user so that subscriptions can be assigned to the person.
- In the Office 365 admin center page, select Users > Active users.
Figure 7 - Add users
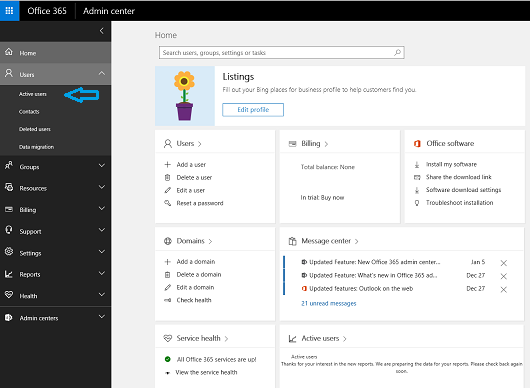
- In the Home > Active users page, you can add users individually or in bulk.
-
To add users one at a time, select + Add a user.
If you select this option, you'll see the New user screen and you can add details about the new user including their name, user name, role, and so on. You also have the opportunity to assign Product licenses. For detailed step-by-step info on adding a user account, see Add a user account in the Office 365 admin center in Add users individually or in bulk to Office 365 - Admin Help.
Figure 8 - Add an individual user

-
To add multiple users at once, select More and then choose + Import multiple users. If you select this option, you'll need to create and upload a CSV file containing the list of users.
The Import multiple users screen includes a link where you can learn more about importing multiple users and also links for downloading a sample CSV file (one with headers only and another with headers and sample user information). For detailed step-by-step info on adding multiple users to Office 365, see Add several users at the same time to Office 365 - Admin Help. Once you've added all the users, don't forget to assign Product licenses to the new users.
Figure 9 - Import multiple users

2.3 Add Azure AD to your domain
In the Office 365 admin center, select Admin centers > Azure AD.
Note
You will need Azure AD Premium to configure automatic MDM enrollment with Intune.
You should see the Microsoft Azure portal once you've successfully added Azure AD.
Figure 5 - Microsoft Azure portal

2.4 Add groups in Azure AD
TBD
2.5 Configure automatic MDM enrollment with Intune
TBD
2.6 Configure Windows Store for Business for app distribution
TBD
3. Set up devices
3.1 Set up new devices
To set up new Windows devices, go through the Windows initial device setup or first-run experience to configure your device.
- Go through the Windows device setup experience. On a new or reset device, this starts with the Hi there screen.
- If you don't have a Wi-Fi network configured, make sure you connect the device to the Internet through a wired/Ethernet connection.
- Select the option to Join this device to Azure Active Directory.
- Sign in using one of the accounts you set up for your education tenant.
3.2 Verify correct device setup
Verify that the device is set up correctly and boots without any issues.
To verify that the device was set up correctly
- Click on the Start menu and select some of the options to make sure everything launches properly.
- Confirm that the Store and built-in apps are working.
3.3 Verify the device is Azure AD joined
In the Intune management console, verify that the device is joined to Azure AD and shows up as being managed in Microsoft Intune.
To verify if the device is joined to Azure AD
- Log in to the Intune management console.
- Select Groups and go to Groups > All Devices > All Mobile Devices.
- Select All Direct Managed Devices and then select the Devices tab.
- See the list of devices and verify that the device you're signed into appears on the list.
Figure XX - List of all direct managed devices

3.4 Reconfigure app deployment settings
In some cases, if an app is missing from the device, you need to reconfigure the deployment settings for the app and set the app to require installation as soon as possible.
To reconfigure app deployment settings
- In the Intune management console, select Apps and go to Apps > Volume-Purchased Apps.
- Select the app, right-click, then select Manage Deployment....
- Select the group(s) whose apps will be managed.
- Check the Deployment Action setting for the app.
- For each group that you selected, set Approval to Required Install. This automatically sets Deadline to As soon as possible. If Deadline is not automatically set, set it to As soon as possible.
Figure XX - Reconfigure an app's deployment setting in Intune

- Verify that the app shows up on the device. You can check which users and devices have the app installed by selecting the app and checking the status in the General tab or selecting the Devices or Users tab.
4. Manage device settings and features
You can use Microsoft Intune admin settings and policies to manage features on your organization's mobile devices and computers. For more info, see Manage settings and features on your devices with Microsoft Intune policies.
In this walkthrough, we'll show you how to add a new policy that will disable the camera for the Intune-managed devices and turn off Windows Hello and PINs during setup.
To disable the camera
- In the Intune admin console, choose Policy > Configuration Policies > Add.
- On the Create a New Policy page, select Windows > General Configuration (Windows 10 Desktop and Mobile and later).
- Click Create Policy.
- On the Create Policy page, select Device Capabilities.
- In the General section, add a name and description for this policy. For example:
- Name: Test Policy - Disable Camera
- Description: Disables the camera
- In the Hardware section, configure Allow camera and choose No from the dropdown list.
- Click Save Policy.
- On the Deploy Policy dialog box, select Yes to deploy the policy now.
- On the Management Deployment dialog box, select the user group(s) or device group(s) that you want to apply the policy to. For example, select All Students.
- Click OK.
To turn off Windows Hello and PINs during device setup
- In the Intune admin console, select Admin.
- Navigate to Mobile Device Management > Windows > Windows Hello for Business.
- In the Windows Hello for Business page, select Disable Windows Hello for Business on enrolled devices.
- Click Save.
Note
This policy is a tenant-wide Intune setting. It disables Windows Hello and required PINs during setup for all enrolled devices in a tenant.
5. Add more devices and users
After your cloud infrastructure is set up and you have a device management strategy in place, you may need to add more devices or users and you want the same policies to apply to these new devices and users. In this section, we'll show you how to do this.
5.1 Connect other devices to your cloud infrastructure
Adding a new device to your cloud-based tenant is easy. For new devices, you can follow the steps in 3. Set up devices. For other devices, such as those personally-owned by teachers who need to connect to the school network to access work or school resources (BYOD), you can follow the steps in this section to get these devices connected.
Note
These steps enable users to get access to the organization's resources, but it also gives the organization some control over the device.
To connect a device to your work or school
- On your Windows device, go to Settings > Accounts.
- Select Work access and then click Add a work or school account to add an Azure AD account to the device.
- Enter the work credentials for the account to authenticate the user.
- If it appears, accept the MDM terms prescribed by the organization to allow the device to be managed. Once this is done, the device should be registered in Azure AD and enrolled in MDM and the account should have access to the organization's resources.
5.2 Add a new user
You can add new users to your tenant simply by adding them to the Office 365 groups. Adding new users to Office 365 groups automatically adds them to the corresponding groups in Microsoft Intune.
See Add users to Office 365 to learn more. Once you're done adding new users, go to the Intune admin portal and verify that the same users were added to the Intune groups as well.