6.6 KiB
title, description, ms.date, ms.prod, ms.topic, ms.localizationpriority, author, ms.author, ms.reviewer, manager
| title | description | ms.date | ms.prod | ms.topic | ms.localizationpriority | author | ms.author | ms.reviewer | manager |
|---|---|---|---|---|---|---|---|---|---|
| How to disable Windows Information Protection (WIP) | How to disable Windows Information Protection (WIP) in Microsoft Intune or Configuration Manager. | 07/15/2022 | m365-security | how-to | medium | lizgt2000 | lizlong | aaroncz | dougeby |
How to disable Windows Information Protection (WIP)
Applies to:
- Windows 10
- Windows 11
Use Intune to disable WIP
To disable Windows Information Protection (WIP) using Intune, you have the following options:
Option 1 - Unassign the WIP policy (preferred)
When you unassign an existing policy, it removes the intent to deploy WIP from those devices. When that intent is removed, the device removes protection for files and the configuration for WIP. For more information, see Assign user and device profiles in Microsoft Intune.
Option 2 - Change current WIP policy to off
If you’re currently deploying a WIP policy for enrolled or unenrolled devices, you switch the WIP policy to Off. When devices check-in after this change, the devices will proceed to unprotect files previously protected by WIP.
- Sign in to the Microsoft Endpoint Manager admin center.
- Open Microsoft Intune and select Apps > App protection policies > In Client apps - App protection policies, select <> apps. Select the existing policy to turn off.
- From App protection policy, select the name of your policy, and then select the properties.
- Edit Required settings. :::image type="content" alt-text="Create Configuration Item wizard, choose your WIP-protection level." source="images/wip-configmgr-disable-wip.png":::
- Set Windows Information Protection mode to off.
- After making this change, select Review and Save.
- Select Save.
Note
Another option is to create a disable policy that sets WIP to Off. You can create a separate disable policy for WIP (both enrolled and unenrolled) and deploy that to a new group. You then can stage the transition to this disabled state. Move devices from the existing group to the new group. This process slowly migrates devices instead of all at once.
Revoke local encryption keys during the unenrollment process
Determine whether to revoke a user's local encryption keys from a device when it's unenrolled from Windows Information Protection. If the encryption keys are revoked, a user no longer has access to encrypted corporate data. The options are:
- Yes, or not configured. Revokes local encryption keys from a device during unenrollment.
- No (recommended). Stop local encryption keys from being revoked from a device during unenrollment. For example, if you're migrating between Mobile Device Management (MDM) solutions.
Use Configuration Manager to disable WIP
To remove Windows Information Protection (WIP) using Configuration Manager
Warning
Don't just delete your existing WIP policy. For Configuration Manager there's only one option to create a new policy that turns WIP mode off. Otherwise the devices will remove the Configuration Manager policy but not change the WIP mode.
Add a WIP policy
To disable WIP for your organization, first create a configuration item.
-
Open the Configuration Manager console, select the Assets and Compliance node, expand the Overview node, expand the Compliance Settings node, and then expand the Configuration Items node.
-
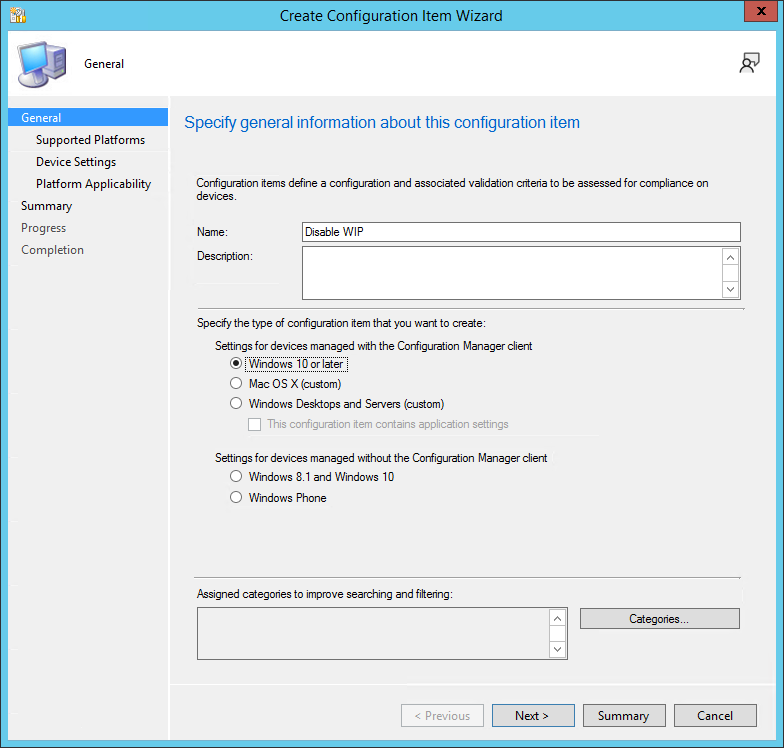
Select the Create Configuration Item button. The Create Configuration Item Wizard starts.
-
On the General Information screen, type a name (required) and an optional description for your policy into the Name and Description boxes.
-
In the Specify the type of configuration item you want to create area, select Windows 10 or later for devices managed with the Configuration Manager client, and then select Next.
-
On the Supported Platforms screen, select the Windows 10 box, and then select Next.
-
On the Device Settings screen, select Windows Information Protection, and then select Next.
The Configure Windows Information Protection settings page appears, where you'll configure your policy for your organization.
Manage the WIP-protection level for your enterprise data
Set the Windows Information Protection mode to Off.
:::image type="content" alt-text="Create Configuration Item wizard, choose your WIP-protection level." source="images/wip-configmgr-disable-wip.png":::
Define your enterprise-managed identity domains
Tip
For more information on filling out the required fields, see Create and deploy a Windows Information Protection (WIP) policy using Microsoft Endpoint Configuration Manager.
Add your corporate identity
- Type the name of your corporate identity into the Corporate identity field. For example,
contoso.comorcontoso.com|newcontoso.com.
Corporate identity must match the string in the original policy.

Choose where apps can access enterprise data
After you've added a protection mode to your apps, you'll need to decide where those apps can access enterprise data on your network.
To define where your protected apps can find and send enterprise data on you network
Add additional network locations your apps can access by selecting Add. The Add or edit corporate network definition box appears. Add the required fields.
In the required Upload a Data Recovery Agent (DRA) certificate to allow recovery of encrypted data box, select Browse to add a data recovery certificate for your policy.

Deploy the WIP policy
After you've created your WIP policy, you'll need to deploy it to your organization's devices. For info about deployment options, see:
-
Create a configuration baseline that includes the new configuration item
-
Move devices from old collection to new collection