2.3 KiB
title, description, ms.assetid, keywords, ms.prod, ms.mktglfcycl, ms.sitesec, ms.pagetype, author, localizationpriority
| title | description | ms.assetid | keywords | ms.prod | ms.mktglfcycl | ms.sitesec | ms.pagetype | author | localizationpriority |
|---|---|---|---|---|---|---|---|---|---|
| Deploy your Windows Information Protection (WIP) policy using Microsoft Intune (Windows 10) | After you’ve created your Windows Information Protection (WIP) policy, you'll need to deploy it to your organization's enrolled devices. | 9c4a01e7-0b1c-4f15-95d0-0389f0686211 | WIP, Windows Information Protection, EDP, Enterprise Data Protection, Intune | w10 | explore | library | security | eross-msft | high |
Deploy your Windows Information Protection (WIP) policy using Microsoft Intune
Applies to:
- Windows 10, version 1607
- Windows 10 Mobile
After you’ve created your Windows Information Protection (WIP) policy, you'll need to deploy it to your organization's enrolled devices. Enrollment can be done for business or personal devices, allowing the devices to use your managed apps and to sync with your managed content and information.
To deploy your WIP policy
-
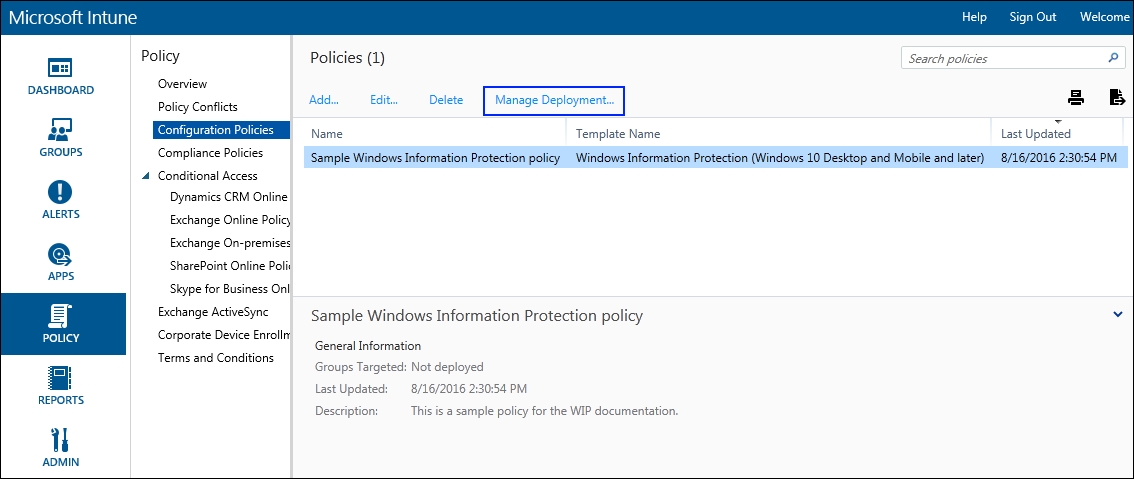
On the Configuration policies page, locate your newly-created policy, click to select it, and then click the Manage Deployment button.
-
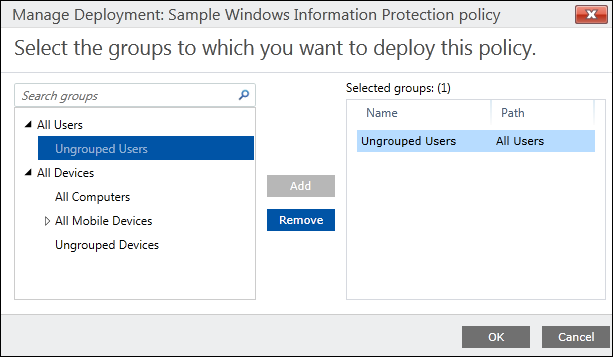
In the left pane of the Manage Deployment box, click the employees or groups that should get the policy, and then click Add.
The added people move to the Selected Groups list on the right-hand pane.
-
After you've picked all of the employees and groups that should get the policy, click OK.
The policy is deployed to the selected users' devices.
Related topics
- Create a Windows Information Protection (WIP) policy using Microsoft Intune
- Add apps to your Windows Information Protection (WIP) policy by using the Microsoft Intune custom URI functionality
- Create and deploy a VPN policy for Windows Information Protection (WIP) using Microsoft Intune
- General guidance and best practices for Windows Information Protection (WIP)