3.9 KiB
title, ms.reviewer, description, keywords, search.product, ms.prod, ms.mktglfcycl, ms.sitesec, ms.pagetype, ms.author, author, ms.localizationpriority, manager, audience, ms.collection, ms.topic
| title | ms.reviewer | description | keywords | search.product | ms.prod | ms.mktglfcycl | ms.sitesec | ms.pagetype | ms.author | author | ms.localizationpriority | manager | audience | ms.collection | ms.topic |
|---|---|---|---|---|---|---|---|---|---|---|---|---|---|---|---|
| Microsoft Defender ATP APIs connection to Power BI | Create custom reports using Power BI | apis, supported apis, Power BI, reports | eADQiWindows 10XVcnh | w10 | deploy | library | security | macapara | mjcaparas | medium | dansimp | ITPro | M365-security-compliance | article |
Create custom reports using Power BI
Applies to: Microsoft Defender Advanced Threat Protection (Microsoft Defender ATP)
- Want to experience Microsoft Defender ATP? Sign up for a free trial.
In this section you will learn create a Power BI report on top of Microsoft Defender ATP APIs.
The first example demonstrates how to connect Power BI to Advanced Hunting API and the second example demonstrates a connection to our OData APIs (e.g. Machine Actions, Alerts, etc..)
Connect Power BI to Advanced Hunting API
-
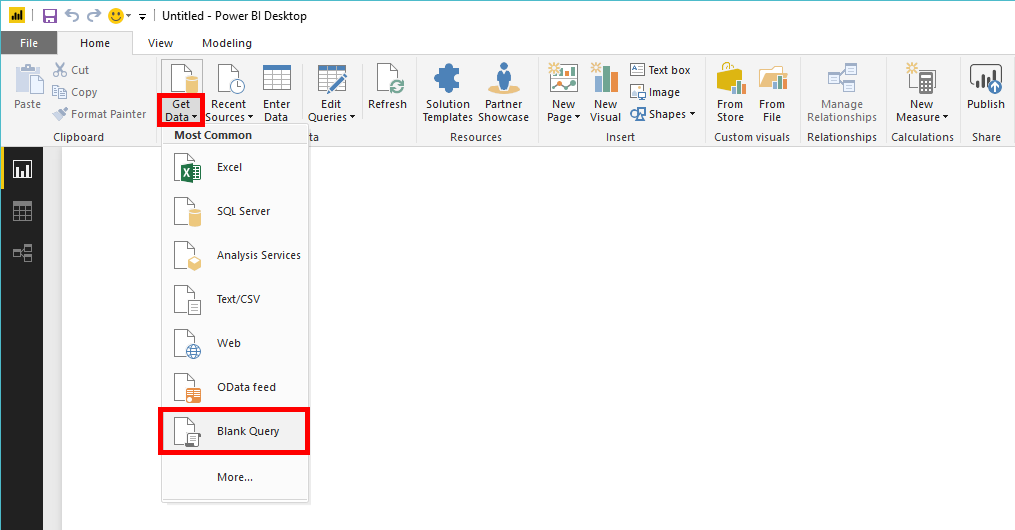
Open Microsoft Power BI
-
Click Get Data > Blank Query
-
Click Advanced Editor
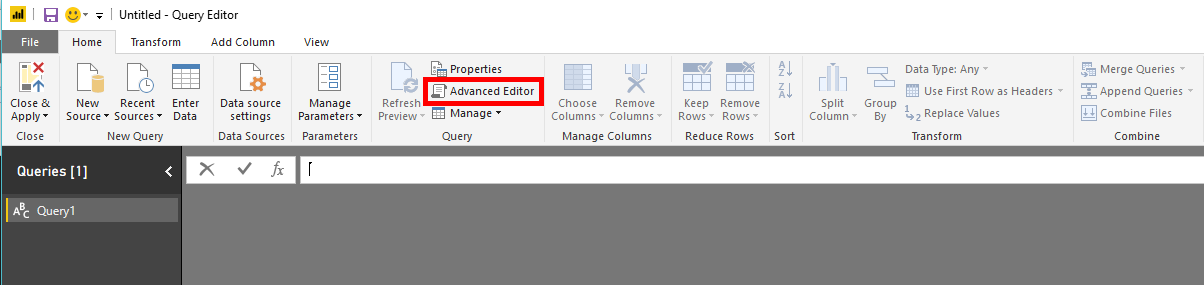
-
Copy the below and paste it in the editor:
	let
		AdvancedHuntingQuery = "MiscEvents | where ActionType contains 'Anti'",

		HuntingUrl = "https://api.securitycenter.windows.com/api/advancedqueries",

		Response = Json.Document(Web.Contents(HuntingUrl, [Query=[key=AdvancedHuntingQuery]])),

		TypeMap = #table(
			{ "Type", "PowerBiType" },
			{
				{ "Double",   Double.Type },
				{ "Int64",    Int64.Type },
				{ "Int32",    Int32.Type },
				{ "Int16",    Int16.Type },
				{ "UInt64",   Number.Type },
				{ "UInt32",   Number.Type },
				{ "UInt16",   Number.Type },
				{ "Byte",     Byte.Type },
				{ "Single",   Single.Type },
				{ "Decimal",  Decimal.Type },
				{ "TimeSpan", Duration.Type },
				{ "DateTime", DateTimeZone.Type },
				{ "String",   Text.Type },
				{ "Boolean",  Logical.Type },
				{ "SByte",    Logical.Type },
				{ "Guid",     Text.Type }
			}),

		Schema = Table.FromRecords(Response[Schema]),
		TypedSchema = Table.Join(Table.SelectColumns(Schema, {"Name", "Type"}), {"Type"}, TypeMap , {"Type"}),
		Results = Response[Results],
		Rows = Table.FromRecords(Results, Schema[Name]),
		Table = Table.TransformColumnTypes(Rows, Table.ToList(TypedSchema, (c) => {c{0}, c{2}}))

	in Table
-
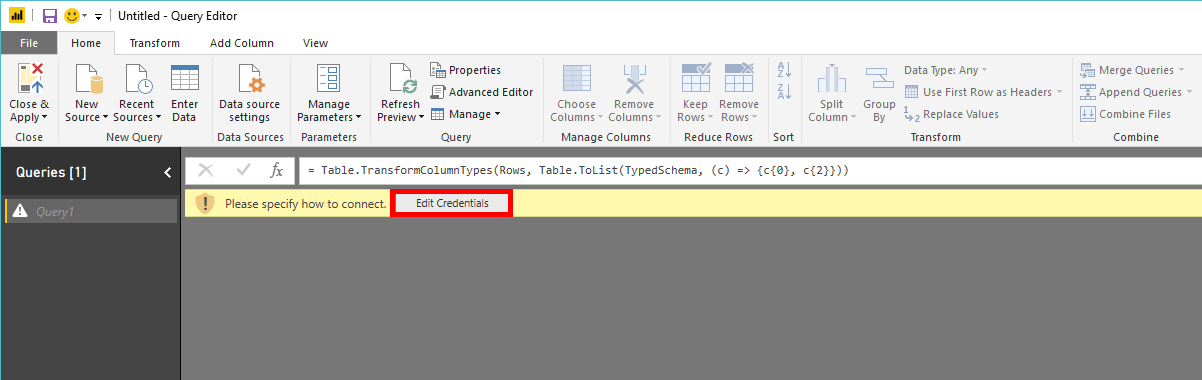
Click Done
-
Click Edit Credentials
-
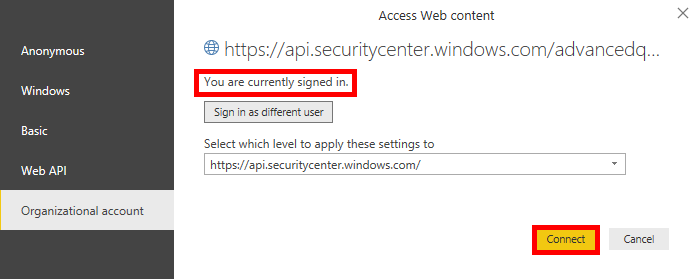
Select Organizational account > Sign in
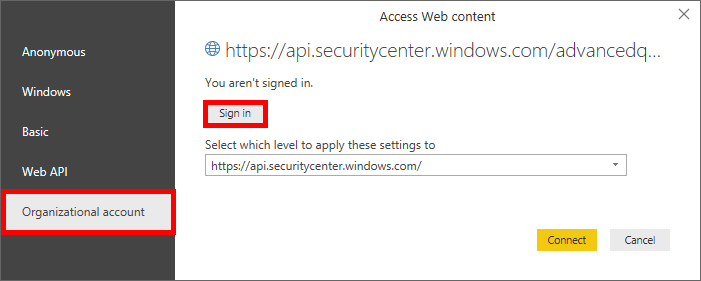
-
Enter your credentials and wait to be signed in
-
Click Connect
-
Now the results of your query will appear as table and you can start build visualizations on top of it!
-
You can duplicate this table, rename it and edit the Advanced Hunting query inside to get any data you would like.
Connect Power BI to OData APIs
-
The only difference from the above example is the query inside the editor.
-
Copy the below and paste it in the editor to pull all Machine Actions from your organization:
	let

		Query = "MachineActions",

		Source = OData.Feed("https://api.securitycenter.windows.com/api/" & Query, null, [Implementation="2.0", MoreColumns=true])
	in
		Source
-
You can do the same for Alerts and Machines.
-
You also can use OData queries for queries filters, see Using OData Queries