5.1 KiB
title, description, keywords, search.product, ms.pagetype, ms.prod, ms.mktglfcycl, ms.sitesec, ms.pagetype, ms.localizationpriority, audience, author, ms.author, ms.reviewer, audience, manager
| title | description | keywords | search.product | ms.pagetype | ms.prod | ms.mktglfcycl | ms.sitesec | ms.pagetype | ms.localizationpriority | audience | author | ms.author | ms.reviewer | audience | manager |
|---|---|---|---|---|---|---|---|---|---|---|---|---|---|---|---|
| Turn on network protection | Enable Network protection with Group Policy, PowerShell, or MDM CSPs | ANetwork protection, exploits, malicious website, ip, domain, domains, enable, turn on | eADQiWindows 10XVcnh | security | w10 | manage | library | security | medium | ITPro | levinec | ellevin | ITPro | dansimp |
Enable network protection
Applies to:
Network protection helps to prevent employees from using any application to access dangerous domains that may host phishing scams, exploits, and other malicious content on the Internet. You can audit network protection in a test environment to see which apps would be blocked before you enable it.
You can enable network protection by using any of these methods:
- Microsoft Intune
- Mobile Device Management (MDM)
- System Center Configuration Manager (SCCM)
- Group Policy
- PowerShell
Intune
- Sign in to the Azure portal and open Intune.
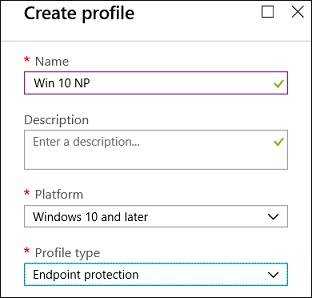
- Click Device configuration > Profiles > Create profile.
- Name the profile, choose Windows 10 and later and Endpoint protection.
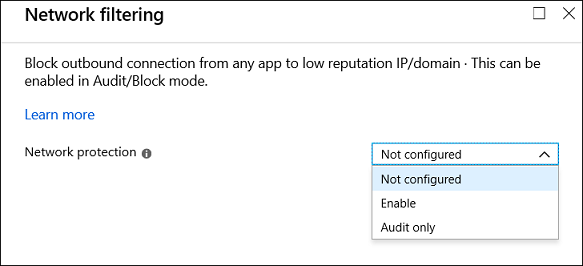
- Click Configure > Windows Defender Exploit Guard > Network filtering > Enable.
- Click OK to save each open blade and click Create.
- Click the profile Assignments, assign to All Users & All Devices, and click Save.
MDM
Use the ./Vendor/MSFT/Policy/Config/Defender/EnableNetworkProtection configuration service provider (CSP) to enable or disable network protection or enable audit mode.
SCCM
- In System Center Configuration Manager, click Assets and Compliance > Endpoint Protection > Windows Defender Exploit Guard.
- Click Home > Create Exploit Guard Policy.
- Enter a name and a description, click Network protection, and click Next.
- Choose whether to block or audit access to suspicious domains and click Next.
- Review the settings and click Next to create the policy.
- After the policy is created, click Close.
Group Policy
You can use the following procedure to enable network protection on domain-joined computers or on a standalone computer.
-
On a standalone computer, click Start, type and then click Edit group policy.
-Or-
On a domain-joined Group Policy management computer, open the Group Policy Management Console, right-click the Group Policy Object you want to configure and click Edit.
-
In the Group Policy Management Editor go to Computer configuration and click Administrative templates.
-
Expand the tree to Windows components > Windows Defender Antivirus > Windows Defender Exploit Guard > Network protection.
-
Double-click the Prevent users and apps from accessing dangerous websites setting and set the option to Enabled. In the options section, you must specify one of the following:
- Block - Users will not be able to access malicious IP addresses and domains
- Disable (Default) - The Network protection feature will not work. Users will not be blocked from accessing malicious domains
- Audit Mode - If a user visits a malicious IP address or domain, an event will be recorded in the Windows event log but the user will not be blocked from visiting the address.
Important
To fully enable network protection, you must set the Group Policy option to Enabled and also select Block in the options drop-down menu.
You can confirm network protection is enabled on a local computer by using Registry editor:
- Click Start and type regedit to open Registry Editor.
- Navigate to HKEY_LOCAL_MACHINE\SOFTWARE\Policies\Microsoft\Windows Defender\Windows Defender Exploit Guard\Network Protection
- Click EnableNetworkProtection and confirm the value:
- 0=Off
- 1=On
- 2=Audit
PowerShell
-
Type powershell in the Start menu, right-click Windows PowerShell and click Run as administrator
-
Enter the following cmdlet:
Set-MpPreference -EnableNetworkProtection Enabled
You can enable the feature in audit mode using the following cmdlet:
Set-MpPreference -EnableNetworkProtection AuditMode
Use Disabled instead of AuditMode or Enabled to turn the feature off.