4.2 KiB
title, description, keywords, search.product, search.appverid, ms.prod, ms.mktglfcycl, ms.sitesec, ms.pagetype, ms.author, author, ms.localizationpriority, manager, audience, ms.collection, ms.topic
| title | description | keywords | search.product | search.appverid | ms.prod | ms.mktglfcycl | ms.sitesec | ms.pagetype | ms.author | author | ms.localizationpriority | manager | audience | ms.collection | ms.topic |
|---|---|---|---|---|---|---|---|---|---|---|---|---|---|---|---|
| Enable SIEM integration in Microsoft Defender ATP | Enable SIEM integration to receive detections in your security information and event management (SIEM) solution. | enable siem connector, siem, connector, security information and events | eADQiWindows 10XVcnh | met150 | w10 | deploy | library | security | macapara | mjcaparas | medium | dansimp | ITPro | M365-security-compliance | article |
Enable SIEM integration in Microsoft Defender ATP
Applies to:
Want to experience Microsoft Defender ATP? Sign up for a free trial.
Enable security information and event management (SIEM) integration so you can pull detections from Microsoft Defender Security Center using your SIEM solution or by connecting directly to the detections REST API.
Note
- Microsoft Defender ATP Alert is composed from one or more detections
- Microsoft Defender ATP Detection is composed from the suspicious event occurred on the Machine and its related Alert details.
Prerequisites
- The user who activates the setting must have permissions to create an app in Azure Active Directory (AAD). This is typically someone with a Global administrator role.
- During the initial activation, a pop-up screen is displayed for credentials to be entered. Make sure that you allow pop-ups for this site.
Enabling SIEM integration
-
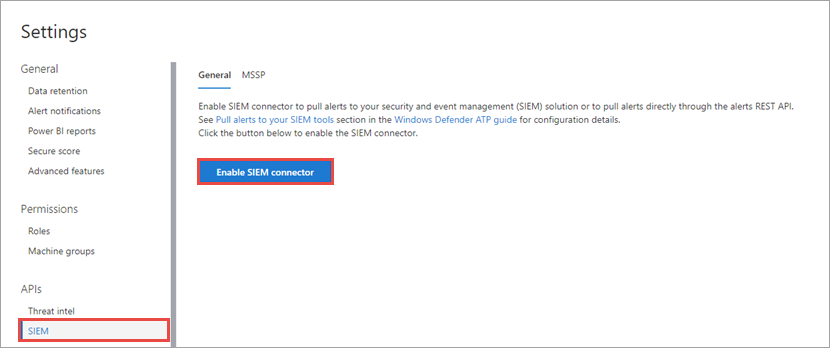
In the navigation pane, select Settings > SIEM.
Tip
If you encounter an error when trying to enable the SIEM connector application, check the pop-up blocker settings of your browser. It might be blocking the new window being opened when you enable the capability.
-
Select Enable SIEM integration. This activates the SIEM connector access details section with pre-populated values and an application is created under you Azure Active Directory (AAD) tenant.
Warning
The client secret is only displayed once. Make sure you keep a copy of it in a safe place.
For more information about getting a new secret see, Learn how to get a new secret.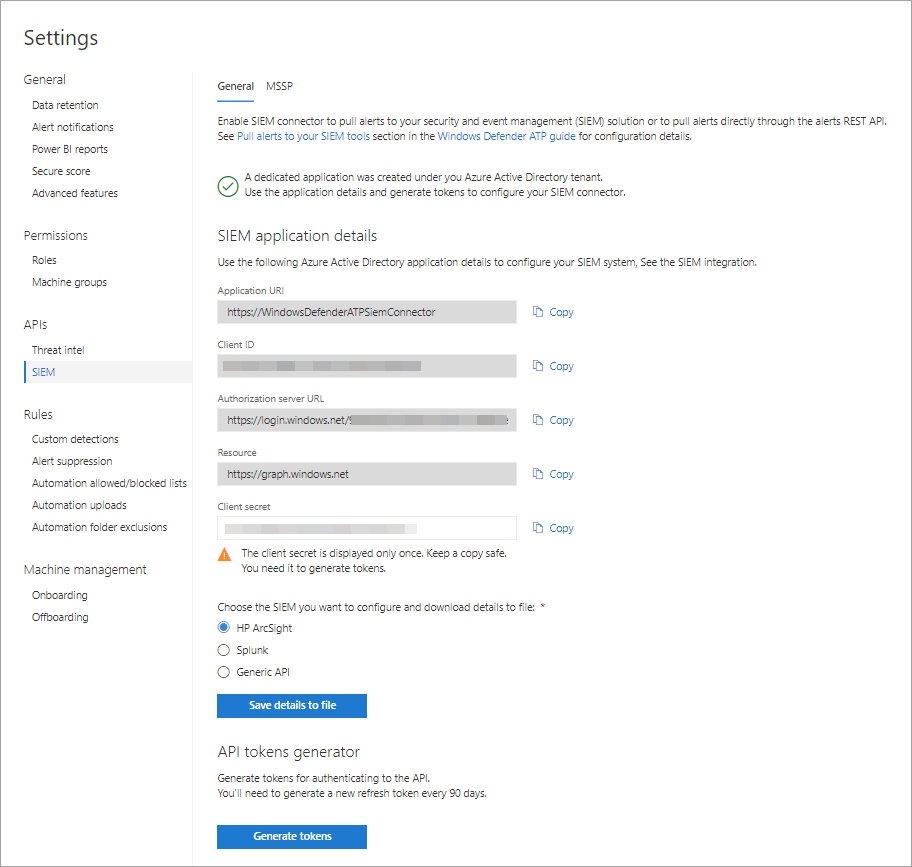
-
Choose the SIEM type you use in your organization.
Note
If you select HP ArcSight, you'll need to save these two configuration files:
- WDATP-connector.jsonparser.properties
- WDATP-connector.properties
If you want to connect directly to the detections REST API through programmatic access, choose Generic API.
-
Copy the individual values or select Save details to file to download a file that contains all the values.
-
Select Generate tokens to get an access and refresh token.
Note
You'll need to generate a new Refresh token every 90 days.
You can now proceed with configuring your SIEM solution or connecting to the detections REST API through programmatic access. You'll need to use the tokens when configuring your SIEM solution to allow it to receive detections from Microsoft Defender Security Center.
Integrate Microsoft Defender ATP with IBM QRadar
You can configure IBM QRadar to collect detections from Microsoft Defender ATP. For more information, see IBM Knowledge Center.