12 KiB
title, description, ms.assetid, keywords, ms.prod, ms.mktglfcycl, ms.pagetype, ms.sitesec, author, localizationpriority
| title | description | ms.assetid | keywords | ms.prod | ms.mktglfcycl | ms.pagetype | ms.sitesec | author | localizationpriority |
|---|---|---|---|---|---|---|---|---|---|
| Add apps to your Windows Information Protection (WIP) policy by using Microsoft Azure Intune custom URI functionality (Windows 10) | Add apps to your Windows Information Protection (WIP) allowed app list, by using the Microsoft Azure Intune custom URI functionality and AppLocker. | b50db35d-a2a9-4b78-a95d-a1b066e66880 | WIP, Enterprise Data Protection, protected apps, protected app list | w10 | explore | security | library | eross-msft | high |
Add apps to your Windows Information Protection (WIP) policy by using the Microsoft Azure Intune custom URI functionality
Applies to:
- Windows 10, version 1703
- Windows 10 Mobile, version 1703
You can add apps to your Windows Information Protection (WIP) protected app list using the Microsoft Azure Intune custom URI functionality and AppLocker. For more info about how to create a custom URI using Intune, Windows 10 custom policy settings in Microsoft Azure Intune.
Important
Results can be unpredictable if you configure your policy using both the UI and the Custom URI method together. We recommend using a single method for each policy.
Add Store apps
-
Open the Local Security Policy snap-in (SecPol.msc).
-
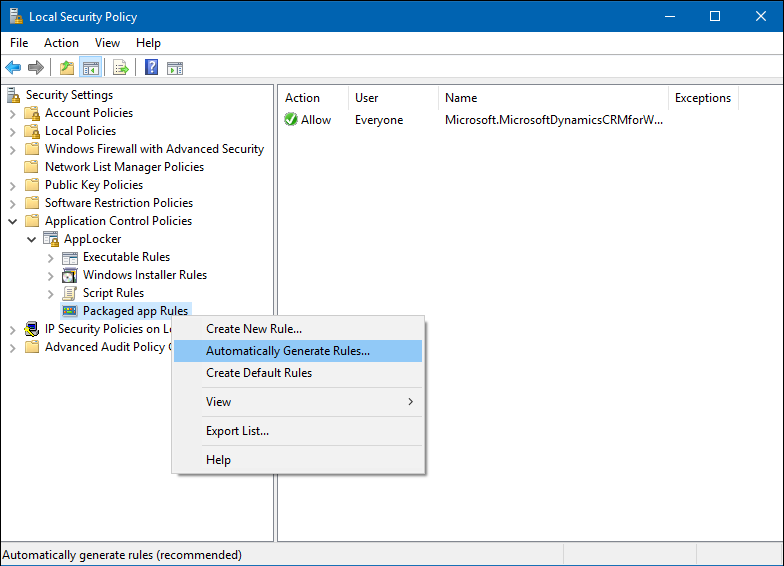
In the left pane, expand Application Control Policies, expand AppLocker, and then click Packaged App Rules, and then right-click and choose Automatically Generate Rules.
The Automatically Generate Packaged app Rules wizard opens, letting you create WIP-protected app policies for all the installed apps on a device or for packaged apps within a specific folder.
-
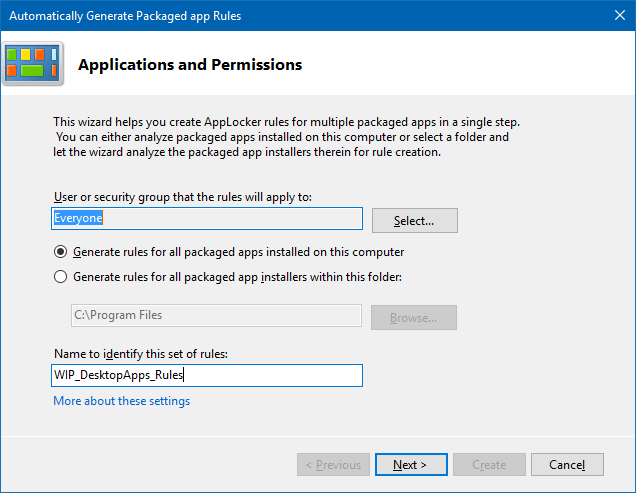
In the Applications and Permissions screen, keep the default of Everyone in the User or security group that the rules will apply to box.
Keeping this value applies your WIP policy to the managed device, not to a single user or group of users.
-
Type the name you’ll use to tag the rules into the Name to identify this set of rules box, and then click Next.
This name should be easily recognizable. For the purposes of this topic, we've used WIP_StoreApps_Rules.

-
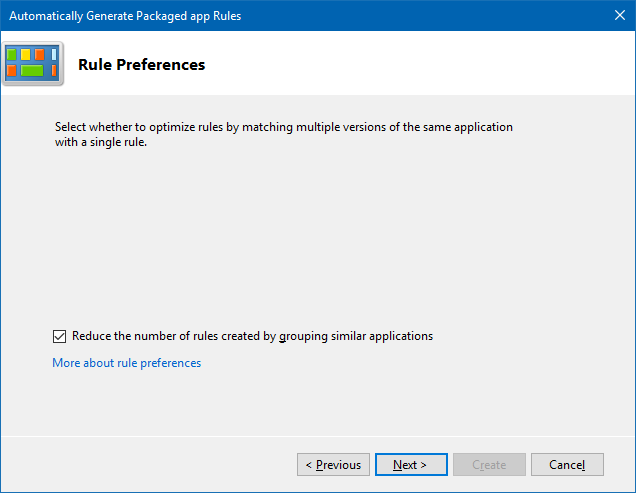
In the Rule Preferences screen, keep the default settings, and then click Next to start generating the rules.
Note
We recommend that you use Publisher rules because they only work with apps you've specifically defined and they can be configured to not require updating simply because a new version came out.
If you can't use Publisher rules, we then recommend that you use File hash rules. File hash rules are a secure alternative that can be used on unsigned code. The primary disadvantage to File hash is that every time a binary changes (such as, through servicing updates or upgrades), you'll need to create a new rule.
-
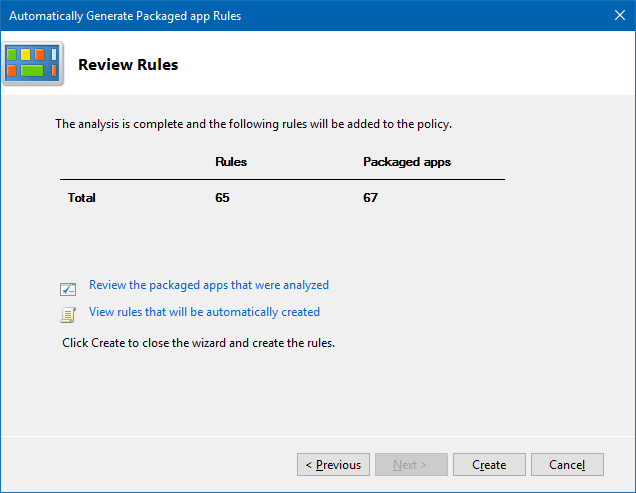
In the Review Rules screen, look over your rules to make sure they’re right, and then click Create to add them to your collection of rules.
-
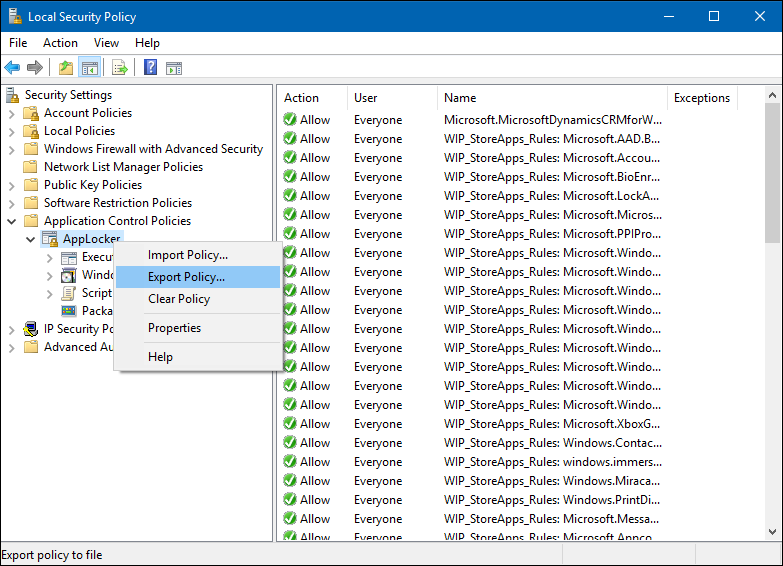
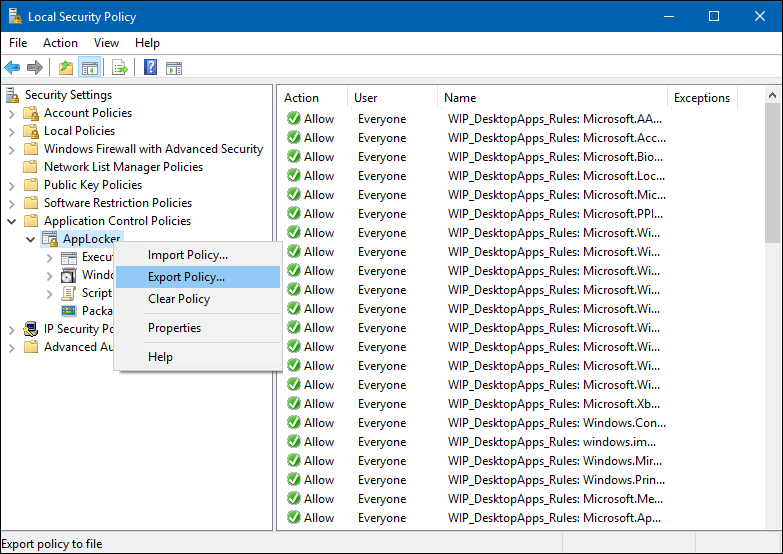
In the left pane, right-click AppLocker, click Export Policies, go to where you want to save the XML file and type a file name, click Save, and then clear your AppLocker rules.
Important
Be aware that what you're saving are the actual AppLocker rules using your local policy. You don't want to apply these rules to your employee devices, you just want to use them to create and export the XML content. You must delete the AppLocker rules before you apply your policy.
-
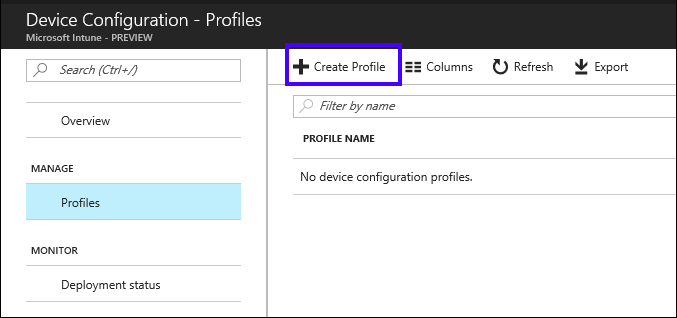
Open the Microsoft Azure Intune mobile application management console, click Device configuration, and then click Create Profile.
-
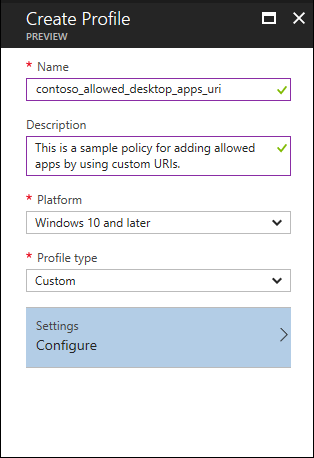
In the Create Profile blade, type a name for your profile, such as contoso_allowed_store_apps_uri, into the Name box, add an optional description for your policy into the Description box, select Windows 10 and later from the Platform dropdown box, select Custom from the Profile type dropdown box, and then click Configure.

-
In the Custom OMA-URI Settings blade, click Add.
-
In the Add Row blade, type:
-
Name. Type a name for your setting, such as AllowedStoreAppsURI.
-
Description. Type an optional description for your setting.
-
OMA-URI. Type ./Vendor/MSFT/AppLocker/EnterpriseDataProtection/>your_enterprise_name</StoreApp EXE into the box.
-
Data type. Select String from the dropdown box.
-
Value. To find the text to type here, follow these steps:
-
Open File Explorer, go to the location where you saved your exported XML file from above, and open it using an XML editor, such as Notepad.
-
Copy the text that includes the Type of
Appxwithin the RuleCollection tags, pasting this info into the Value box. For example:<RuleCollection Type="Appx" EnforcementMode="Enabled"><your_xml_rules_here></RuleCollection>
-
-
-
Click OK to save your setting info in the Add Row blade, and then click OK in the Custom OMA-URI Settings blade to save the setting with your policy.
-
Click Create to create the policy, including your OMA_URI info.
After saving the policy, you’ll need to deploy it to your employee’s devices. For more info, see the Deploy your Windows Information Protection (WIP) policy topic.
Add Desktop apps
-
Open the Local Security Policy snap-in (SecPol.msc).
-
In the left pane, expand Application Control Policies, expand AppLocker, and then click Packaged App Rules, and then right-click and choose Automatically Generate Rules.
The Automatically Generate Packaged app Rules wizard opens, letting you create WIP-protected app policies for all the installed apps on a device or for packaged apps within a specific folder.
-
In the Applications and Permissions screen, keep the default of Everyone in the User or security group that the rules will apply to box.
Keeping this value applies your WIP policy to the managed device, not to a single user or group of users.
-
Type the name you’ll use to tag the rules into the Name to identify this set of rules box, and then click Next.
This name should be easily recognizable. For the purposes of this topic, we've used WIP_DesktopApps_Rules.
-
In the Rule Preferences screen, keep the default settings, and then click Next to start generating the rules.
Important
You can also use Path rules instead of the File hash if you have concerns about unsigned files potentially changing the hash value if they're updated in the future.
Note
We recommend that you use Publisher rules because they only work with apps you've specifically defined and they can be configured to not require updating simply because a new version came out.
If you can't use Publisher rules, we then recommend that you use File hash rules. File hash rules are a secure alternative that can be used on unsigned code. The primary disadvantage to File hash is that every time a binary changes (such as, through servicing updates or upgrades), you'll need to create a new rule.
Finally, there's Path rules. Path rules are easier to set up and maintain, but can let apps bypass Windows Information Protection (WIP) by simply renaming and moving an unallowed file to match one of the apps on the Protected App list. For example, if your Path rule says to allow
%PROGRAMFILES%/NOTEPAD.EXE, it becomes possible to rename DisallowedApp.exe to Notepad.exe, move it into the specified path above, and have it suddenly be allowed. -
In the Review Rules screen, look over your rules to make sure they’re right, and then click Create to add them to your collection of rules.
-
In the left pane, right-click AppLocker, click Export Policies, go to where you want to save the XML file and type a file name, click Save, and then clear your AppLocker rules.
Important
Be aware that what you're saving are the actual AppLocker rules using your local policy. You don't want to apply these rules to your employee devices, you just want to use them to create and export the XML content. You must delete the AppLocker rules before you apply your policy.
-
Open the Microsoft Azure Intune mobile application management console, click Device configuration, and then click Create Profile.
-
In the Create Profile blade, type a name for your profile, such as contoso_allowed_desktop-apps_uri, into the Name box, add an optional description for your policy into the Description box, select Windows 10 and later from the Platform dropdown box, select Custom from the Profile type dropdown box, and then click Configure.
-
In the Custom OMA-URI Settings blade, click Add.
-
In the Add Row blade, type:
-
Name. Type a name for your setting, such as AllowedDesktopAppsURI.
-
Description. Type an optional description for your setting.
-
OMA-URI. Type ./Vendor/MSFT/AppLocker/EnterpriseDataProtection/>your_enterprise_name</EXE into the box.
-
Data type. Select String from the dropdown box.
-
Value. To find the text to type here, follow these steps:
-
Open File Explorer, go to the location where you saved your exported XML file from above, and open it using an XML editor, such as Notepad.
-
Copy the text that includes the Type of
Exewithin the RuleCollection tags, pasting this info into the Value box. For example:<RuleCollection Type="Exe" EnforcementMode="Enabled"><your_xml_rules_here></RuleCollection>
-
-
-
Click OK to save your setting info in the Add Row blade, and then click OK in the Custom OMA-URI Settings blade to save the setting with your policy.
-
Click Create to create the policy, including your OMA_URI info.
After saving the policy, you’ll need to deploy it to your employee’s devices. For more info, see the Deploy your Windows Information Protection (WIP) policy topic.
Note
Help to make this topic better by providing us with edits, additions, and feedback. For info about how to contribute to this topic, see Contributing to TechNet content.
Related topics
- Create a Windows Information Protection (WIP) policy using Microsoft Azure Intune
- Deploy your Windows Information Protection (WIP) policy
- Create and deploy a VPN policy for Windows Information Protection (WIP) using Microsoft Azure Intune